How to...
Setup Dispense Integration with Fred Classic & Fred Plus

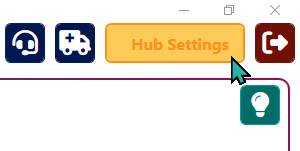
Open your Hub Settings (i.e., the settings cog in the top-right of the Pharmacy Halo Hub).

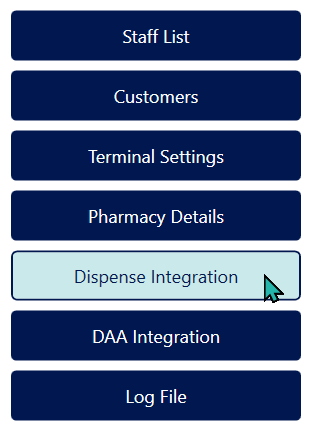
Select Dispense Integration.
Fred Classic
If you DO know the name of your server computer

To get dispense integration setup with Fred Classic, all that’s needed is name of the computer that is the server for your Fred Dispense software data.
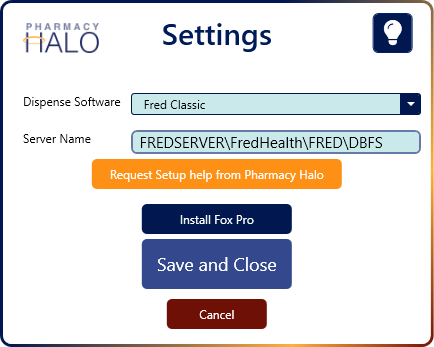
If you already know the name of this computer, open the Pharmacy Halo Hub, head to Hub Settings (i.e., the golden settings cog in the top-right of the page) > Dispense Integration, choose Fred Classic as your dispense software, and then input the following in the Server Name field:
<your_server_name>\FredHealth\FRED\DBFS
Replace <your_server_name> with the name of your server. As you can see in the image on the left, this example pharmacy’s server name is “FREDSERVER”, so they input FREDSERVER\FredHealth\FRED\DBFS.
The Pharmacy Halo Hub will then tell you if your settings have worked correctly. If you receive an error, please don’t hesitate to click on the Request Setup help from Pharmacy Halo button, which will ping our team to reach out to you ASAP.
If you DO NOT know the name of your server computer

In Fred Classic, head to the Setup tab at the top of the program, and then click into System Configuration.
You should see an area at the bottom of the window that opens that looks similar to the image on the left, where your server name is in the field labelled Drive. In the image, this pharmacy’s server computer is FREDSERVER.
Once you have your server name, open the Pharmacy Halo Hub, head to Hub Settings > Dispense Integration, choose Fred Classic as your dispense software, and then input the following in the Server Name field:
<your_server_name>\FredHealth\FRED\DBFS
Replace <your_server_name> with the name of your server. For a pharmacy with the server name FREDSERVER, you would input FREDSERVER\FredHealth\FRED\DBFS.
The Pharmacy Halo Hub will then tell you if your settings have worked correctly. If you receive an error, please don’t hesitate to click on the Request Setup help from Pharmacy Halo button, which will ping our team to reach out to you ASAP.

Once you’ve successfully setup your dispense integration on one computer, you won’t ever need to do this again unless there is a change to your server or dispensing software.
When you install the Pharmacy Halo Hub onto a new computer, it will inherit the integration settings automatically when you first login.
If you already had the Hub installed and running on another computer during the integration setup process, all you need to do is close and reopen it and the new settings will synchronise.
If the SpeedScan fields aren’t showing at the top of the Quda homescreen on a specific computer despite having setup your dispense integration:
- Restart the program (i.e., right-click the Pharmacy Halo Hub icon in your system tray and click “Quit Hub”)
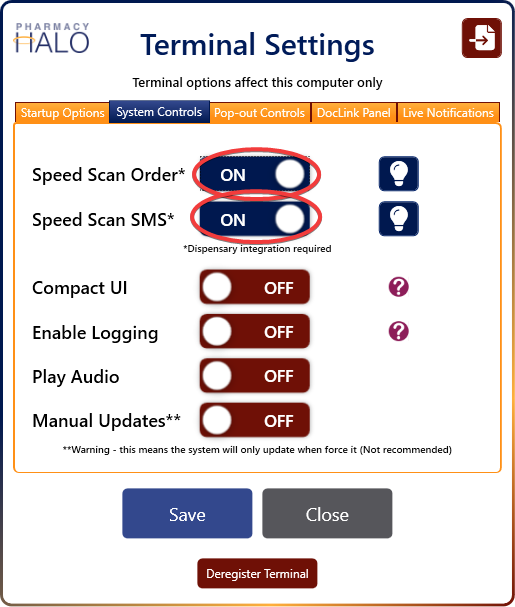
- Head to Hub Settings > Terminal Settings > System Controls and ensure both Speed Scan Order and Speed Scan SMS are activated on that computer.
Fred Plus
To get integration setup with Fred Dispense Plus, the team at Fred IT require a Sensitive Data Access form to be submitted on behalf of the pharmacy. You can access this form with the link below, and it only takes a few minutes to fill out and submit:
For Question 2 “Request Type”, choose the option “Authorisation”, and for Question 3 “Which party and/or integration does this request relate to?”, choose “Quda by Pharmacy Halo”.
Within 1-3 business days of your request being submitted, a representative from the team at Fred IT will call the pharmacy to confirm the submission. After successful confirmation, they will then send through an access key, and one of our team members will be in touch ASAP after receiving this key to help you complete the setup.
Alternatively, you can also just copy+paste this code into the Client Key field in the Hub Settings > Dispense Integration area after selecting Fred Plus as your dispense software.

